Como usar o Spray Bike (em inglês)
28/03/2021

How To Use Spray Bike
Spray.Bike is a groundbreaking range of bicycle-specific colour coating designed for both amateur and professional use.
Spray.Bike paint is a dry matte powder-coating that doesn’t drip, dribble or misbehave in any way.
It’s revolutionary in its ease of application and quality of finish, making it perfect for customising, repairing and restoring.
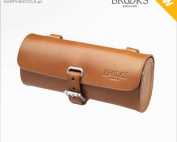
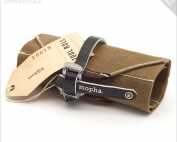
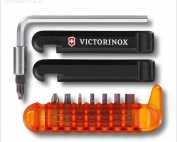
Related Products

Solid colors tech spec
- Highly pigmented acrylic paint compound
- Dry-fall powder coating
- Non-drip, non-dribble formula
- Suitable for steel, aluminium and carbon surfaces
- Permanent and resilient: UV-resistant and weather-resistant
- Deep matte colors
- Easily-achieved fading, stenciling and blending effects (see below)
- Requires no post-application equipment or heat treatment
- 400ml and 200ml options
- 1 x 400ml can will cover a frame and fork in a single coat
- Minimum recommended coats: one
Instructions for use
- Ensure surface is clean and dry
- Primer is not required but is recommended
- Wear protective gloves, protective clothing, eye/face protection
- Always paint in an open space in the open air
- Shake can for at least 3 minutes before use
- Test spray for 2-3 seconds prior to application
- Optimal temperature for spraying: 60-75°F. Do not use Spray.Bike if the temperature is below 55°F or above 85°F, or if relative humidity is above 70%
- Always spray with the can in a vertical position, otherwise the paint might ‘spit’ unevenly
- Solid colors: spray surface from a distance of 2-4 inches
- Pocket Clears, Frame Builder’s Smoothing Putty, Frame Builder’s Transparent Finish, Frame Builder’s Cold-Zinc, Frame Builder’s Metal Primer, Frame Builder’s Carbon Primer, Frame Builder’s Metal Plating: spray surface from a distance of at least 8 inches
- Keirin Flake and Keirin Sunlight: spray surface from a distance of at least 12 inches
- Frame Builder’s Top Wax: Spray onto a paper towel or soft lint-free cloth and apply gently
- When spraying, keep hand moving at all times
- Allow to dry before adding 2nd coat (touch dry: 10 minutes, complete cure: 2 hours)
- Do not use isopropyl alcohol over paint
- At end, turn can upside down and spray for 2 seconds before storing
- Protect can from sunlight and temperatures exceeding 50°C/122°F
- For a satin or gloss top-coat, finish with Spray.Bike Frame Builder’s Transparent Finish – Satin/Gloss.
- For ongoing protection (whether the finish is matte, satin or gloss), regularly apply the Frame Builder’s Top Wax
| Spray distance | |
|---|---|
| All solid colors | 5-12 cm |
| Pocket Clears Frame Builder’s Cold-Zinc Frame Builder’s Metal Primer Frame Builder’s Carbon Primer Frame Builder’s Smoothing Putty Frame Builder’s Transparent Finish | at least 20 cm |
| Keirin Collection | at least 30 cm |
| Frame Builder’s Top Wax | spray onto paper towel or lint-free cloth and apply gently |
Prep – What To Use Before Painting

Spray.Bike paint will adhere to most raw metal and painted surfaces without any major pre-prep. Painting over an existing paint job is preferable both it terms of prep work and durability. We recommend wet sanding with 300-800 (depending on the surface and material you are working with) being mindful to get the tricky spots. The goal is to rough up the surface and a good cleaning with soap and water prior to painting to give the paint the best surface to adhere to. Always ensure that all surfaces are completely clean and grease free. Any micro-film left from degreasers or cleaning products can create a barrier preventing Spray.Bike from adhering properly.
NEVER use acetone or a product containing acetone, as it reactivates the chemicals, weakening the paint. This included products like DEET insect repellent and some sunscreens. A pure medical alcohol is recommended for the ultimate pre-paint cleaner – but do make sure all reside is removed with lint free rags.
| WHAT TO USE BEFORE PAINTING | |
|---|---|
Primer |
use on bare(i.e.unpainted) metal or carbon before painting Metal Primer: all metal Cold Zinc: steel only Carbon Primer: carbon fiber |
Smoothing Putty |
use on old painted frames to cover rust damage, scratches, stickers, etc… before re-painting |
Spraying

It’s essential that you understand and follow the spray distances. These are the distances from the can in your hand to the metal being sprayed. They vary depending on the product:
- Solid colors (BLB, Pop, Historic, Vintage, Pocket Solids): 2-4 inches As Spray.Bike cans are pressurize, there’s an optimum distance at which the paint is effective on leaving the nozzle: 2-4 inches. In this ‘window’ the paint is semi-wet and the pigment is perfectly primed to do its job properly. Under 2 inches, faults can occur. After 5 inches the paint will have turned into a dry powder dust with little adhesion at all.
- Fluorescent: The Fluros are a little tricky to work with due to their high powder content. The biggest mistake people make with them is painting too far away. You want to get nice and close, 2-3 inches from the frame while keeping your hand moving.
- Pocket Clears, Frame Builder’s Smoothing Putty, Frame Builder’s Transparent Finish, Frame Builder’s Cold-Zinc, Frame Builder’s Metal Primer, Frame Builder’s Carbon Primer, Frame Builder’s Metal Plating: at least 8 inches
- Keirin Flake and Keirin Sunlight: at least 12 inches
- Frame Builder’s Top Wax: Spray onto a paper towel or soft lint-free cloth and apply.
Spray.Bike cans must always be held vertically while spraying. When the can is horizontal, the gas propellant rather than the paint is driven into the nozzle, creating a high-pressure paint spit that will land unevenly as lumps. Always move your hand continuously while spraying, as this ensures an even coating. Touch-ups can always be done later – don’t over-apply the paint in a single coat. If re-using the paint after storage, test spray first. If the paint seems to splatter, replace the nozzle as the existing one is probably clogged.
Polishing For best results, always polish Spray.Bike solid colors with parchment paper or a lint-free soft cloth. A gentle pressure and polish action will compact the paint’s surface for greater strength. This is best done before the paint has completely cured, so polish within two hours of spraying. Be more careful where colors meet in order to avoid physically forcing colors to bleed.
Drying For best results, don’t be impatient! Although the coating does seem to dry rapidly (touch dry in a few seconds), it’s always best to let the paint completely dry over a 12 hour period before re-building the bike.
Dealing with problems
Getting areas where the paint has landed as a powder (and has a rougher surface) will happen – but this is easily solved. Leave the paint to completely dry, then using a soft cloth rub gently to smooth the surface. If you do make a mistake (e.g. put color in the wrong place or over-apply the product), wait for the spray to completely dry (max 2 hours). Then using a very fine sandpaper or other abrasive material, slowly rub away the paint. Don’t use a traditional solvent paint remover though as it will damage the acrylic compound in Spray.Bike and you’ll end up making more mess. Do not use isopropyl alcohol at any point on the paint. Remember that the spray distance for the solid colors is 2-4 inches, whereas the spray distance for the Pocket Clears, Frame Builder’s Transparent Finish, Frame Builder’s Smoothing Putty, Frame Builder’s Cold-Zinc, Frame Builder’s Metal Primer, Frame Builder’s Carbon Primer and Frame Builder’s Metal Plating range is at least 8 inches. For the Keirin Collection, it’s at least 12 inches. The Frame Builder’s Top Wax shouldn’t be sprayed directly onto the frame. Instead, spray onto a paper towel or soft lint-free cloth and apply gently.
Dealing with stickers and decals
| Old stickers that you can’t remove and want to paint over: | cover with the Frame Builder’s Smoothing Putty before you paint |
| Old decals that you want to paint over: | just paint over them |
| New stickers or decals: | set on top of your new paint-job and then seal with the Frame Builder’s Transparent Finish |
Note: in vary rare circumstances, the acetone in the Transparent Finish can affect the ink in a decal or sticker. To check this, spray a small amount of Transparent Finish onto a test decal/sticker. If it melts the ink or the ink runs, you’ll have to place the actual decal/sticker over the Transparent Finish on your frameset. Be aware that the Matte Transparent Finish adds an opaque textured layer when sprayed onto a clear surface, so don’t spray onto stickers or decals with a transparent backing – unless you want that transparent backing to have a frosted, opaque effect.
Using the Fluros
Because of the reflective pearlescent particles, the fluro colors are slightly grainier than the other ranges. A base coat of Silvertown / Marylebone or Metal Primer / Cold -Zinc Primer is HIGHLY RECOMMEND to make the fluorescent color pop. Rubbing down about an hour after painting with a soft cloth or parchment paper is recommended to help compress the paint.
Using the Pocket Clears
These are perfect for creating a glaze on raw metal tubing, changing a base color, helping with fades and shades (see blending below). They tend more towards the solid color than a clear finish. Remember that although the spray distance for the solid colors is 2-4 inches, for these Pocket Clears, because they contain the Frame Builder’s Transparent Finish, the spray distance is at least 8 inches.
Using the Keirin Collection
The Flake range consists of 6 colored metal flake options in our Frame Builder’s Transparent Finish. They can be used over Spray.Bike colors to provide an amazing glitter finish – or even used over factory paint to add a unique sparkle effect to the frame. The Sunlight range has 4 colors of crushed liquid glass in the Frame Builder’s Transparent Finish, creating a glitter effect only really viewable in direct sunlight. All colors can be overlaid to create specific color flake mixes. 2 coats recommended. Remember that the spray distance is much further than all our other products: at least 12 inches.
Masking and stenciling
If using masking techniques (with, say, masking tape) or stenciling after an initial coat, always wait 20 minutes before adding masking or a stencil to make sure the paint is dry enough not to be pulled away on removal. Masking can sometimes create lines where paint has built up against the edge of the mask: again wait 20 minutes so as not to pull that build-up away on removal of the stencil/mask. Leave for at least 2 hours to dry, and remove excess colour coat by rubbing down with a soft cloth.
Blending
Use the Pocket Clears for blending as they can produce rapid and unusual color change when used in conjunction with (i.e. on top of) solid colors (especially Fluro Clears on top of solid Fluro colors). The Pocket Clears are a solid pigment with a transparent base layer, so the final color is based on the combination of solid/clear used, e.g. Fluro Yellow Clear on top of a blue will become a green. Use on junctions where 2 dramatic colors meet to create a fade. Give it a bit of practice for great results. Note: with the Pocket Clears, spray the surface from a distance of at least 20 cm.
What to use after paiting

|
WHAT TO USE AFTER PAINTING |
|
|---|---|
Transparent Finish – Satin/Gloss |
use to create a satin or gloss finish after painting (one coat: satin | two or more coats: gloss) |
Transparent Finish – Matte |
use to create a matte finish after painting |
Top Wax |
apply regularly for ongoing protection (whether or not the finish is matte, satin or gloss) |
– Transparent Finish –
Spray.Bike colours are matte.
There are two versions of the Transparent Finish. With the satin/gloss version, one coat gives a satin finish, two or more coats give a gloss finish. The matte version adds a matte top-coat, and can be used on top of Spray.Bike colours to keep them matte, or on top of any gloss finish to turn it matte. Note that with the matte version, the finish appears to be glossy when first applied but don’t worry – it dries completely matte very quickly.
Make sure the paint is completely dry before applying the finish. Shake can well. Hold the can at least 20 cm away from the surface and waft gently, keeping your hand/arm moving at all times. Recommended minimum coat: one.
Drying time between coats: 2 hours / full cure: at least 24 hours.
With new stickers or decals, set on top of your new paint-job and then seal with the Frame Builder’s Transparent Finish. Note though that in vary rare circumstances, the acetone in the Transparent Finish can affect the ink in a decal or sticker. To check this, spray a small amount of Transparent Finish onto a test decal/sticker. If it melts the ink or the ink runs, you’ll have to place the actual decal/sticker over the Transparent Finish on your frameset.
Be aware also that the Matte Transparent Finish adds an opaque textured layer when sprayed onto a clear surface, so don’t spray onto stickers or decals with a transparent backing – unless you want that transparent backing to have a frosted, opaque effect.
![]()
Spray.Bike Frame Builder’s Transparent Finish – Satin/Gloss – 400ml – link –
Spray.Bike colours are matte. This acrylic Transparent Finish dds a satin or gloss topcoat.
- Product colour: clear
- Spray distance: at least 20 cm
- Ιdeal for steel, aluminium and carbon parts
- Recommended minimum coat: one
- One coat: satin / two or more coats: gloss
- Drying time between coats: 2 hours / full cure: at least 24 hours
- Requires no post-application heat treatment
Spray.Bike Frame Builder’s Transparent Finish – Matte – 400ml – link –
This acrylic Transparent Finish adds a matte top-coat. Ideal for use on top of Spray.Bike colours. Also ideal for turning any existing gloss finish into a matte finish.
- Product colour: clear (note: is gloss when first applied but quickly dries matte)
- Spray distance: at least 20 cm
- Ιdeal for steel, aluminium and carbon parts
- Recommended minimum coat: one
- Drying time between coats: 2 hours / full cure: at least 24 hours
- Requires no post-application heat treatment
Storage
Spray.Bike paint lasts in its can for up to 10 years.
Store upright and below 50°C so it will always be there for scratches and touch-ups.
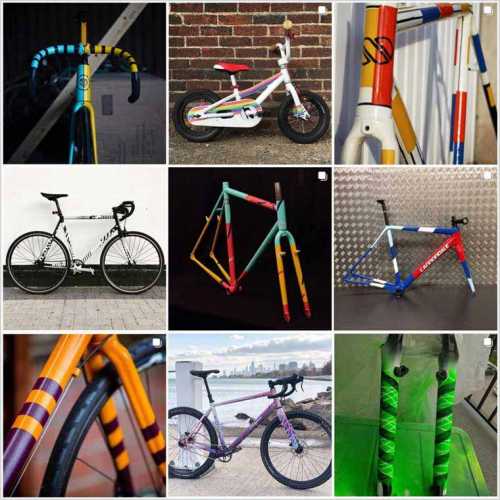
Inspiration
Need some inspiration before you start?
Click here for pics of the fantastic things people are doing with Spray.Bike all round the world